

A windshield replacement involves more than the glass. On this 2017 Ford Explorer, the side moldings, attachment clips, and retainers were an important part of finishing the job properly.
This Explorer was one of four vehicles we serviced for the same customer in Apache Junction, Arizona. Here’s a closer look at the molding work that accompanied its mobile windshield replacement.
Removing the Old Side Moldings
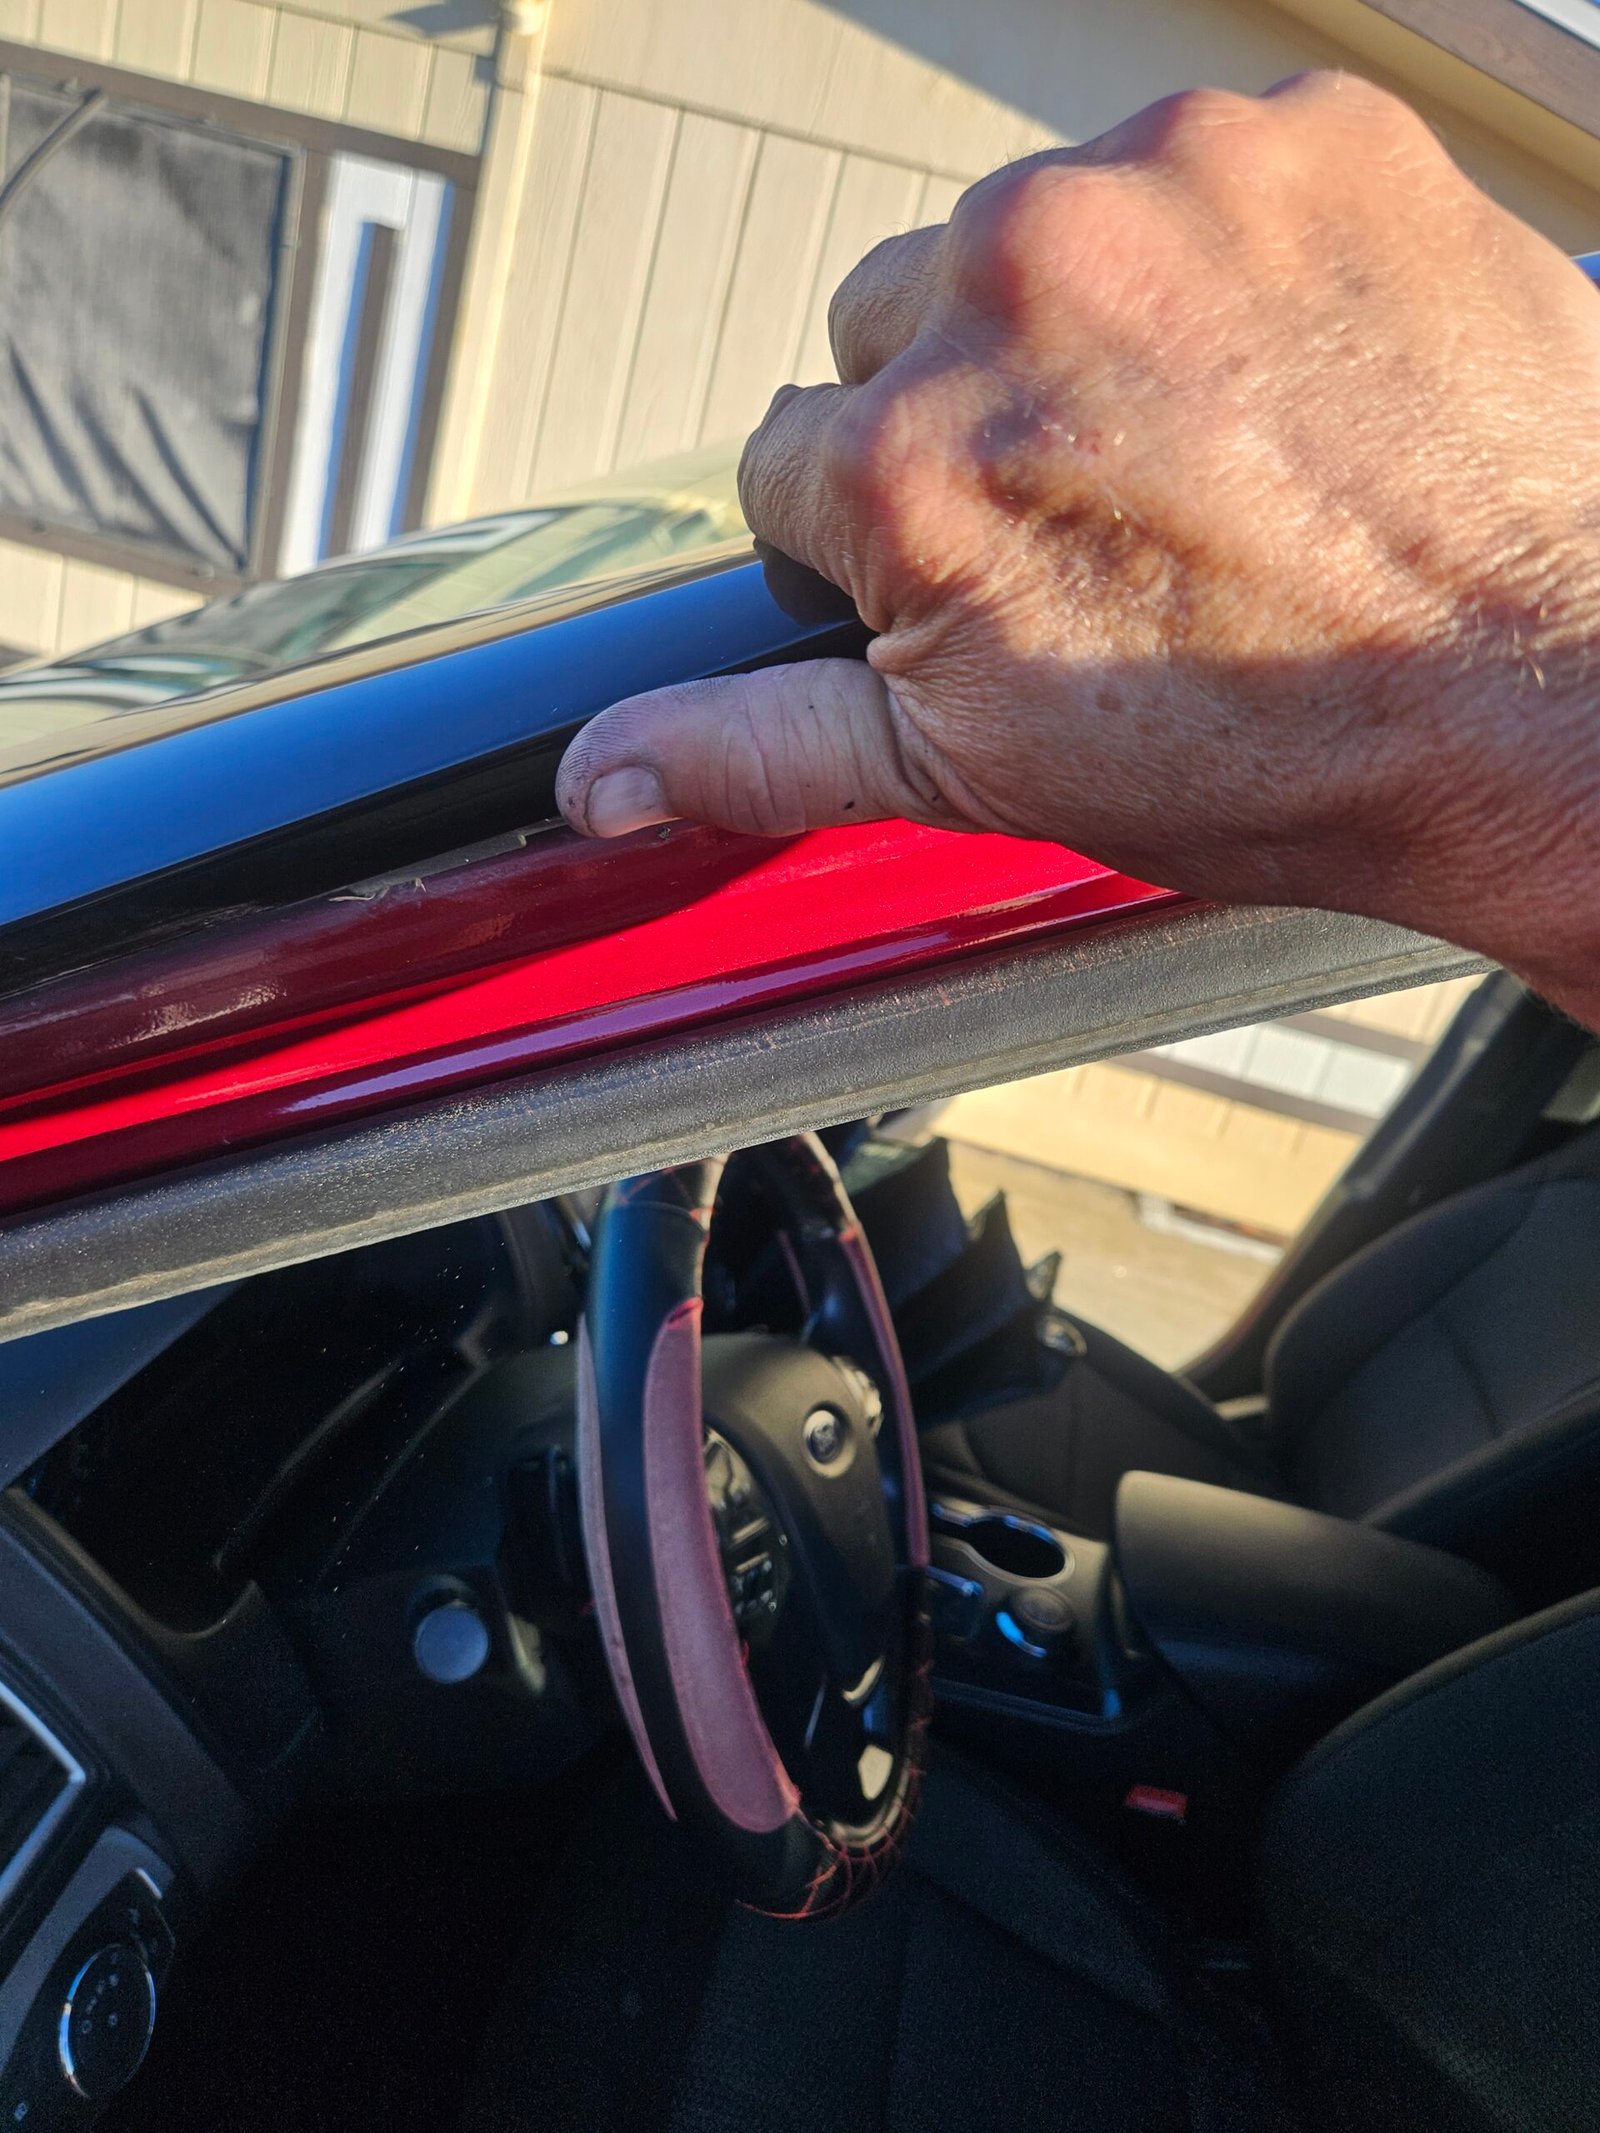
In my experience with this setup, removal damages the old molding and leaves clips behind in the retainer. That’s why I arrive with a replacement molding set rather than counting on reusing the old pieces.
Each side uses seven retainer clips. Before fitting replacements, I remove the old clips and any broken pieces left behind. The comparison photo shows a broken clip beside an intact replacement—a small component that deserves attention before everything is covered again.
Replacing the Clips and Removing the Retainers
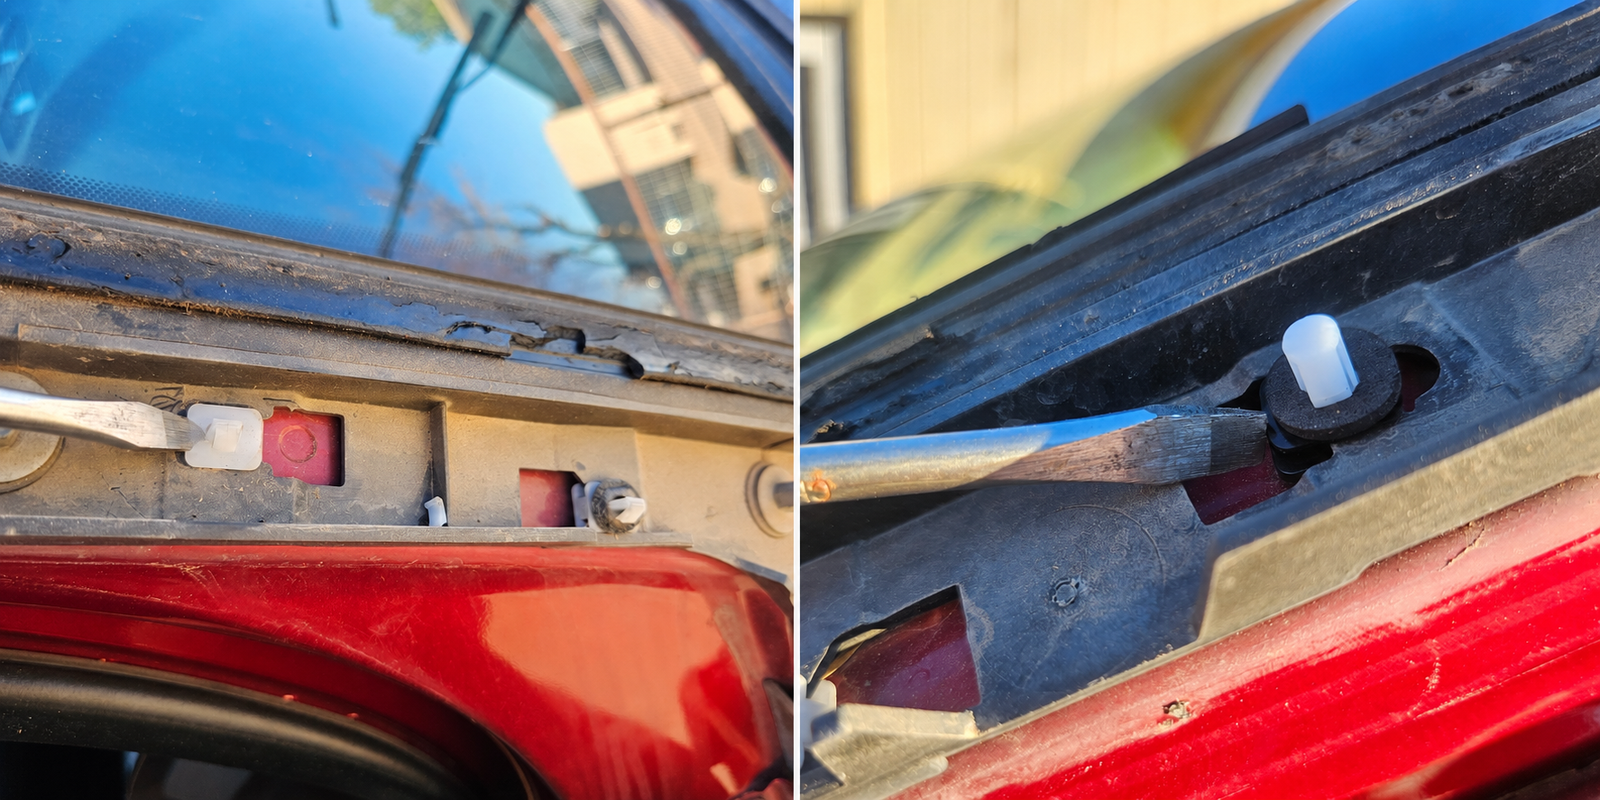
Replacement clips go on in reverse. Their bases have an open end that allows them to slide onto the retainer and a closed end. Some snap into position during fitting.
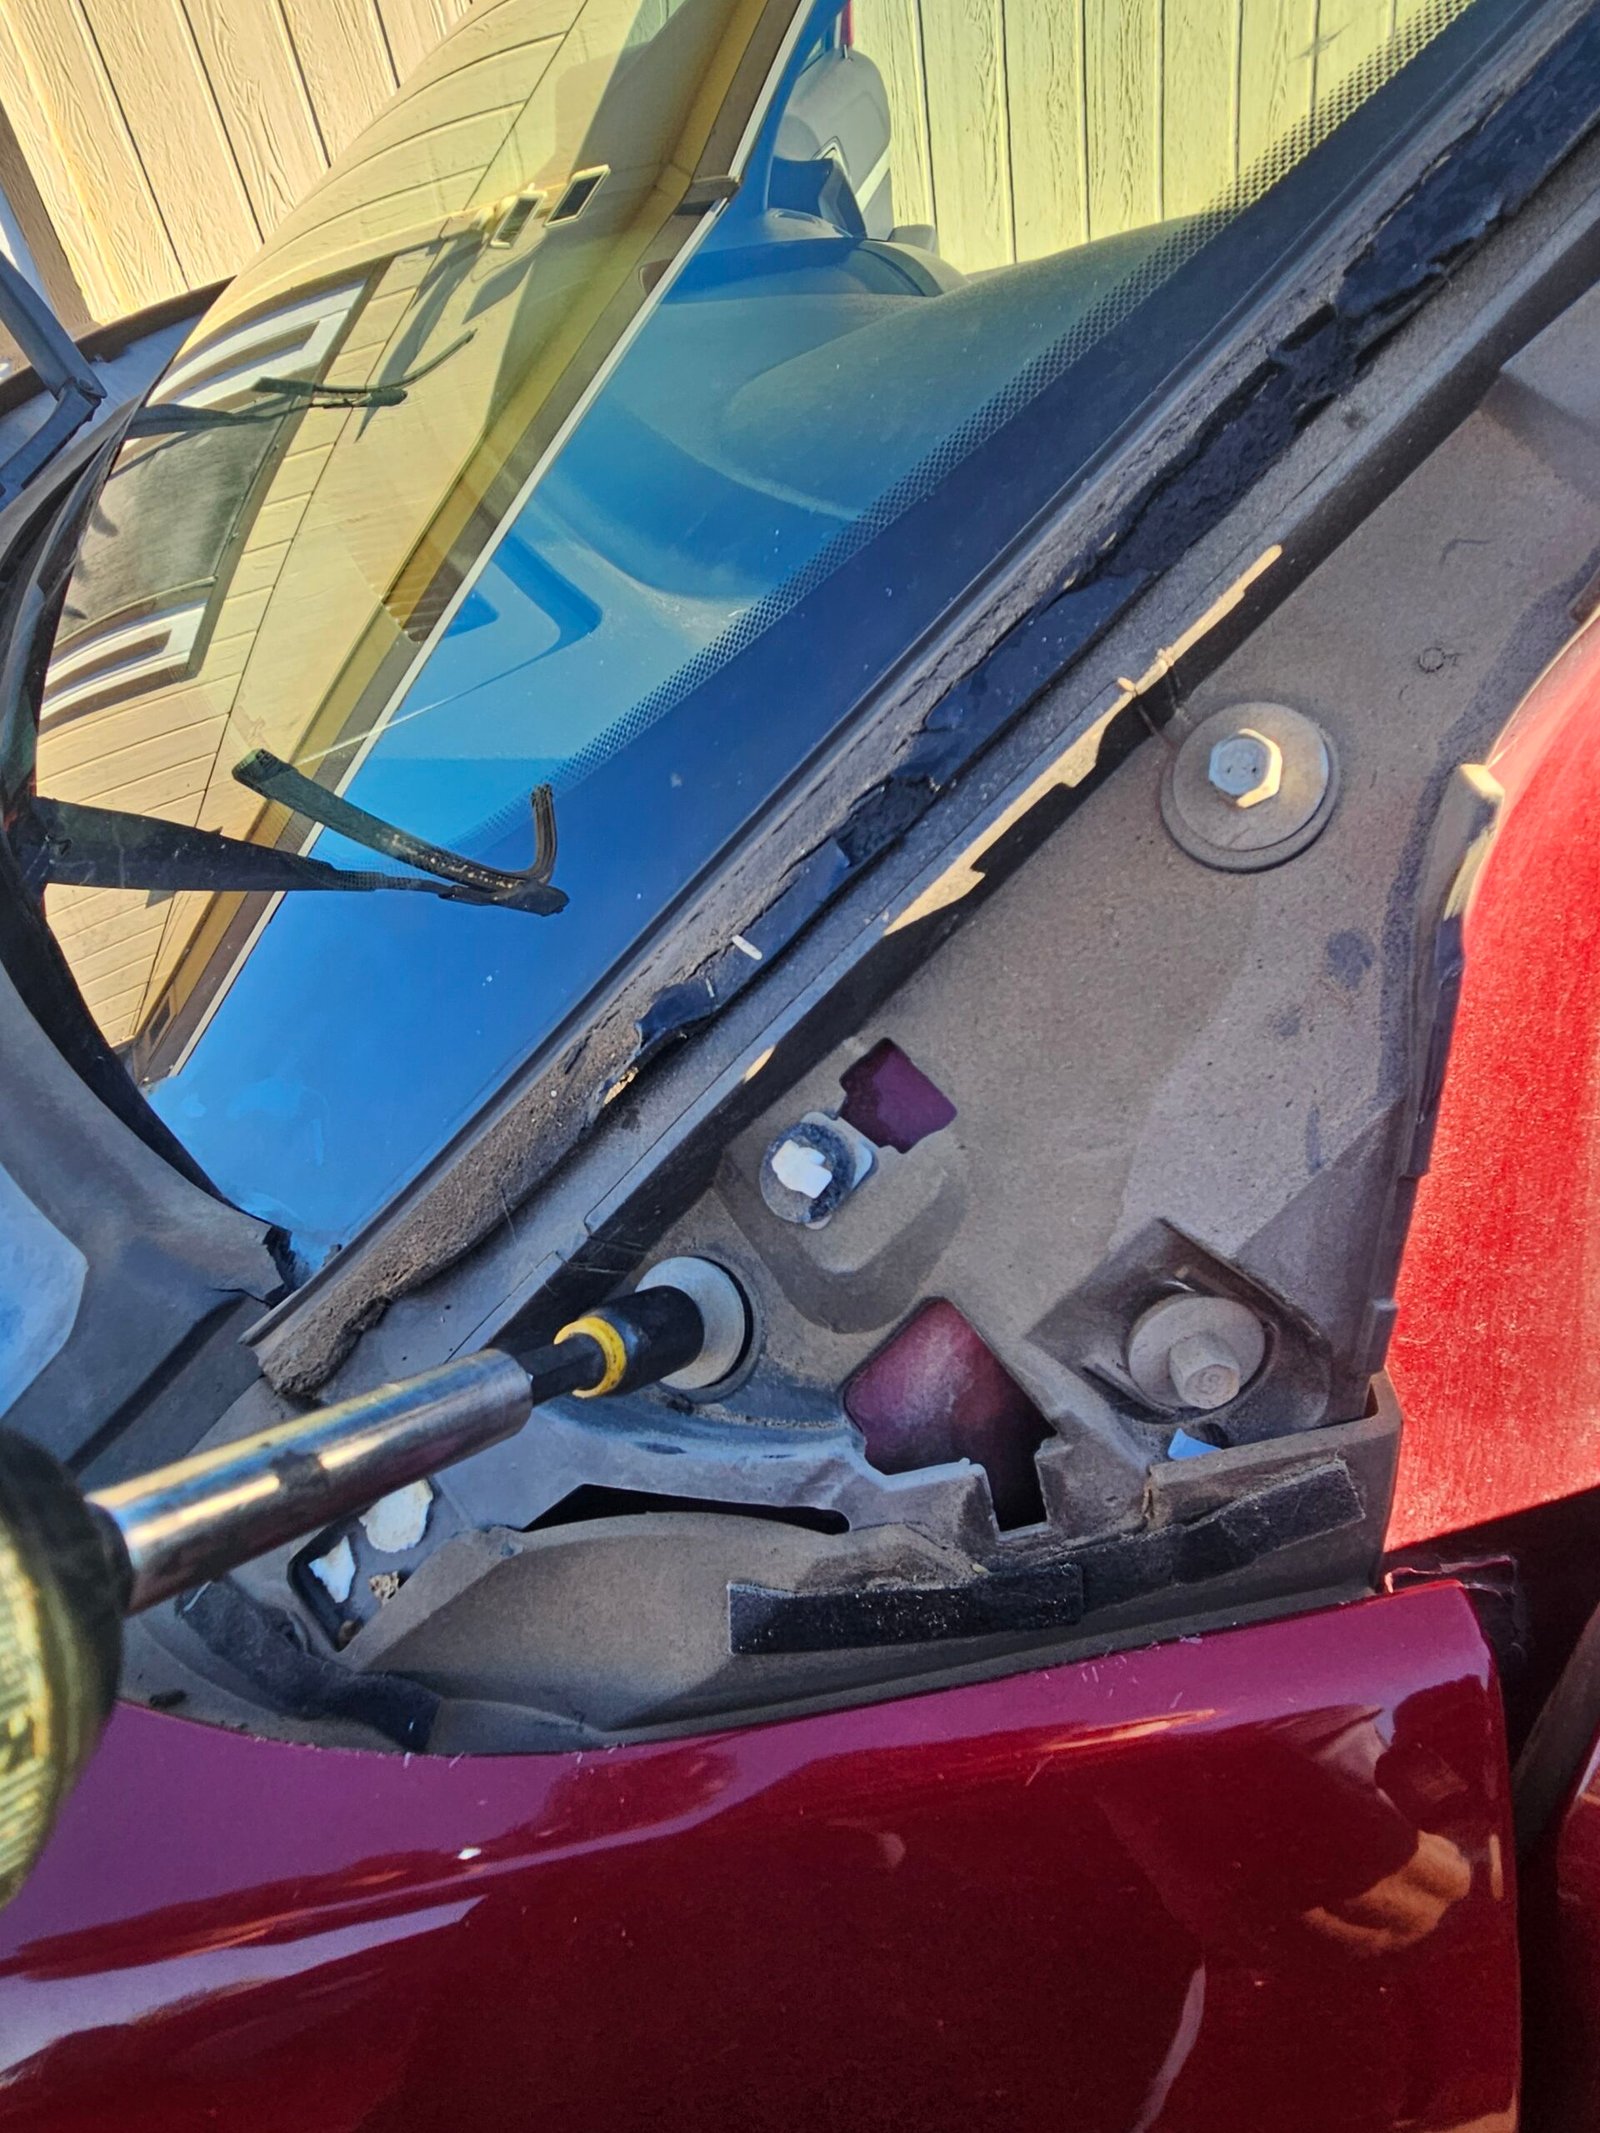
The retainers are separate from the outer moldings. I inspect them before reuse; in my experience, they occasionally need replacement, but that is uncommon.
The Upper Clip Needs Separate Attention
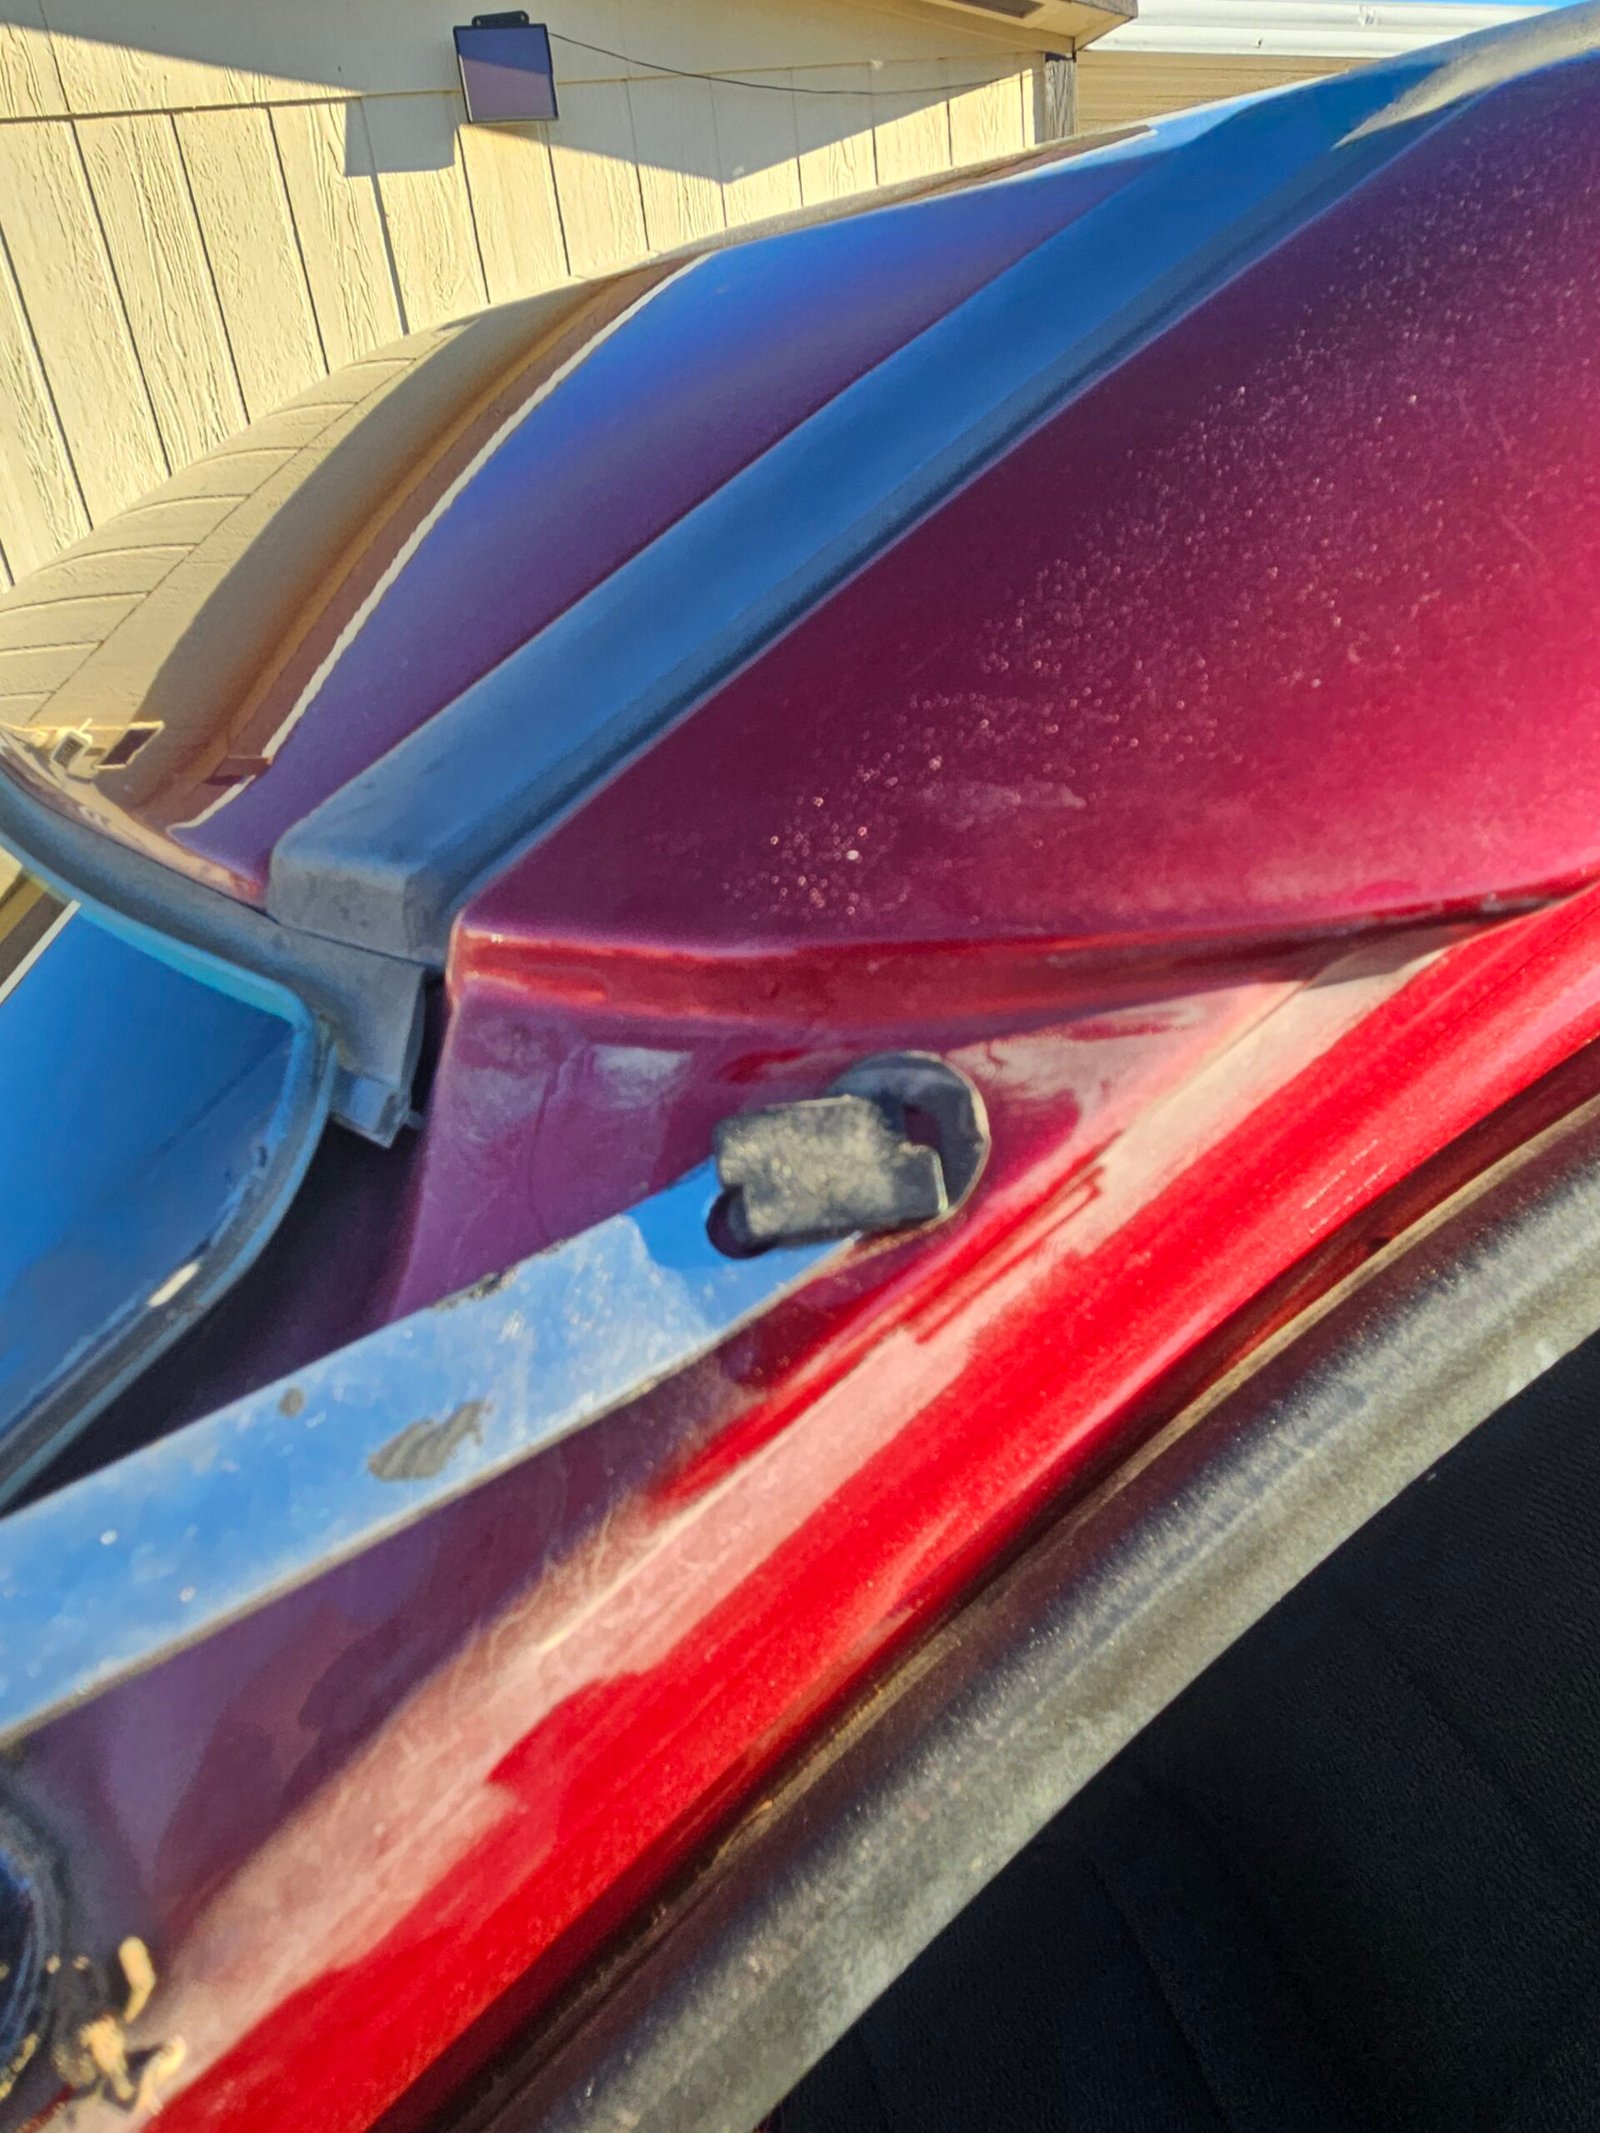
On this Explorer, I used a clip removal tool to extract it. The underside photo of the replacement molding shows the corresponding white upper clip.
This is an easy detail to overlook if attention stays on the seven clips along the retainer. Clearing the old upper attachment prepares the hole for the new molding’s clip.
Aligning the Retainers and New Moldings
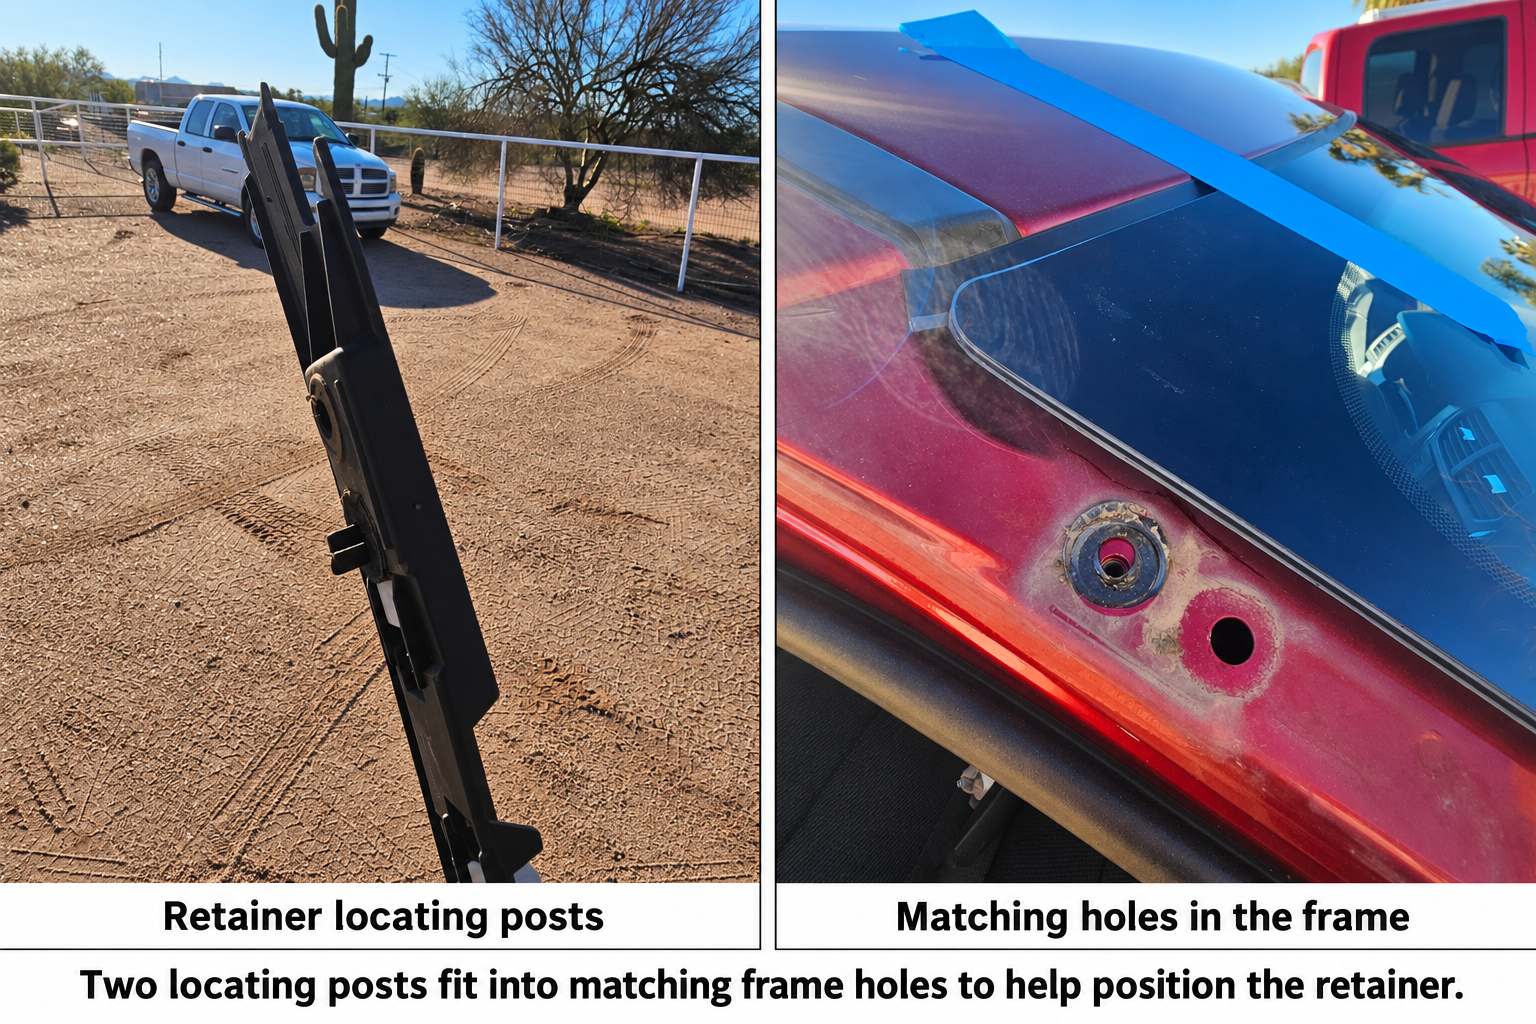
The replacement molding also has a red backing strip covering its butyl. I peel this strip off before installation so the exposed butyl can adhere to the retainer.
Next, I position the molding from the bottom upward without fully snapping it into place. As the attachment points line up, the molding settles slightly into position. Its lower end needs to sit correctly alongside the surrounding bodywork before I commit to seating the clips.
The white upper clip gets particular attention because it is fragile. A slight adjustment to the angle of the molding’s upper end may be needed to line it up with the hole.
Once all attachment points are aligned, I return to the bottom and gently press the molding into the retainer clips, working upward to the top attachment.
A windshield replacement involves more than the glass. On this 2017 Ford Explorer, the side moldings, attachment clips, and retainers were an important part of finishing the job properly.
This Explorer was one of four vehicles we serviced for the same customer in Apache Junction, Arizona. Here’s a closer look at the molding work that accompanied its mobile windshield replacement.
Removing the Old Side Moldings
In my experience with this setup, removal damages the old molding and leaves clips behind in the retainer. That’s why I arrive with a replacement molding set rather than counting on reusing the old pieces.
Each side uses seven retainer clips. Before fitting replacements, I remove the old clips and any broken pieces left behind. The comparison photo shows a broken clip beside an intact replacement—a small component that deserves attention before everything is covered again.
Replacing the Clips and Removing the Retainers
Replacement clips go on in reverse. Their bases have an open end that allows them to slide onto the retainer and a closed end. Some snap into position during fitting.
The retainers are separate from the outer moldings. I inspect them before reuse; in my experience, they occasionally need replacement, but that is uncommon.
The Upper Clip Needs Separate Attention
On this Explorer, I used a clip removal tool to extract it. The underside photo of the replacement molding shows the corresponding white upper clip.
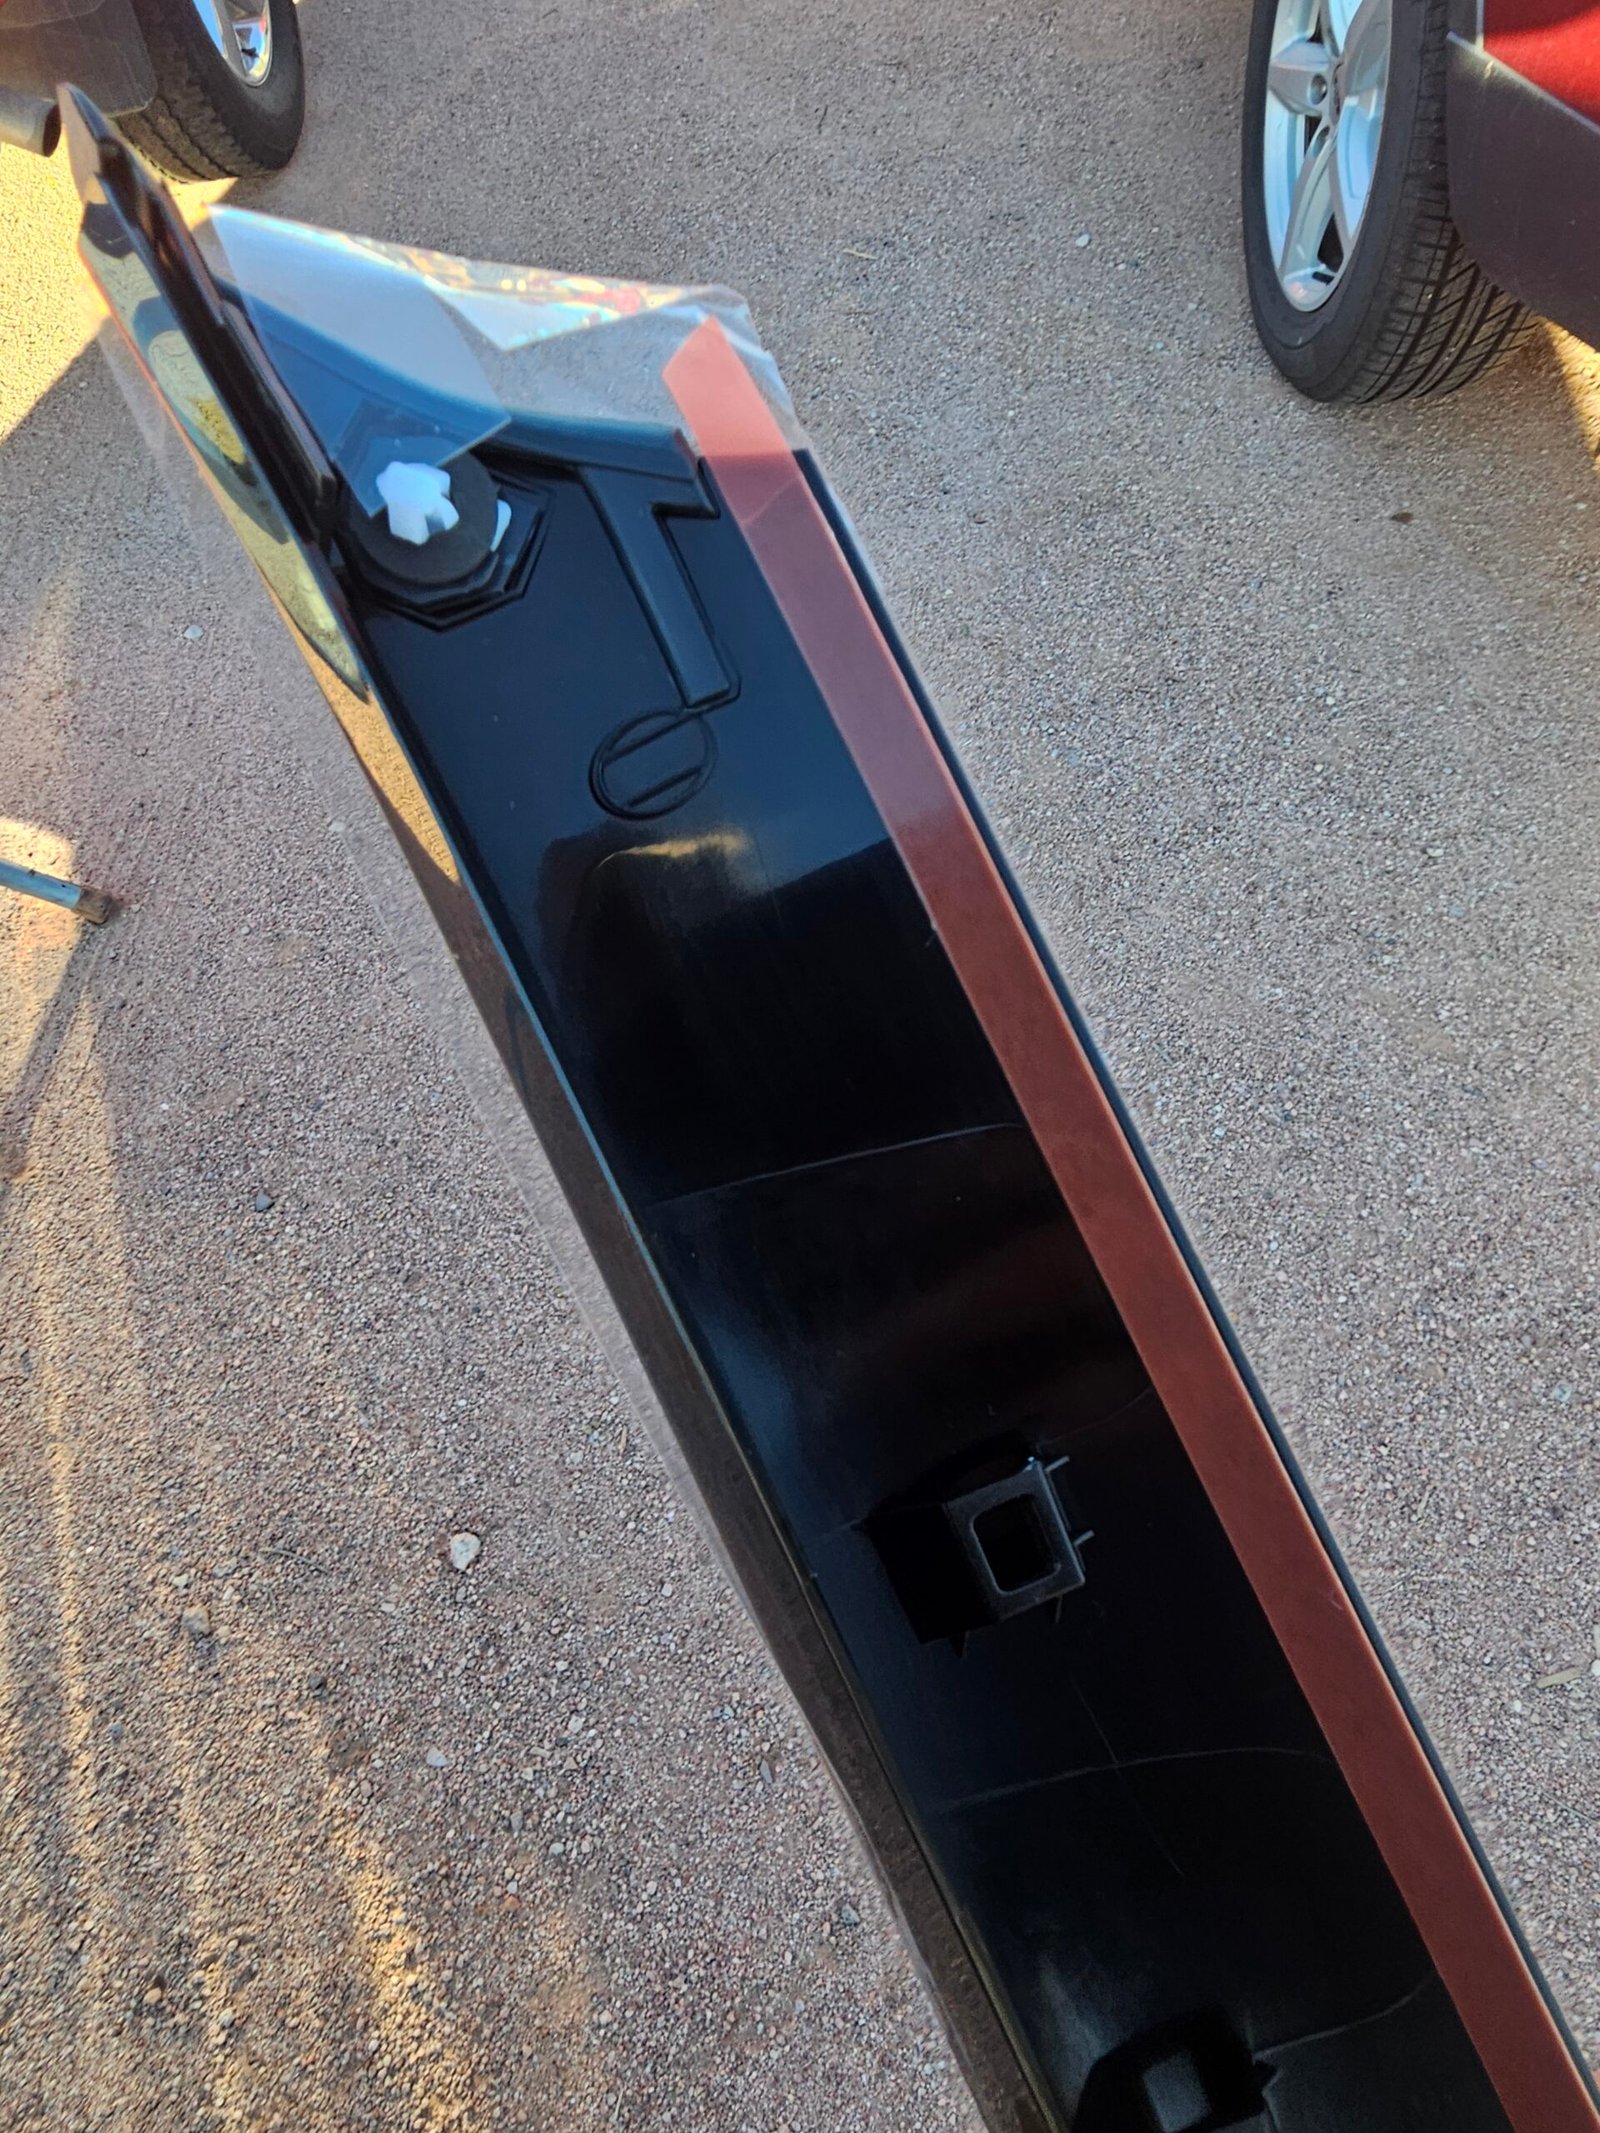
This is an easy detail to overlook if attention stays on the seven clips along the retainer. Clearing the old upper attachment prepares the hole for the new molding’s clip.
Aligning the Retainers and New Moldings
The replacement molding also has a red backing strip covering its butyl. I peel this strip off before installation so the exposed butyl can adhere to the retainer.
Next, I position the molding from the bottom upward without fully snapping it into place. As the attachment points line up, the molding settles slightly into position. Its lower end needs to sit correctly alongside the surrounding bodywork before I commit to seating the clips.
The white upper clip gets particular attention because it is fragile. A slight adjustment to the angle of the molding’s upper end may be needed to line it up with the hole.
Once all attachment points are aligned, I return to the bottom and gently press the molding into the retainer clips, working upward to the top attachment.
